Creating folders
After using Archilogic for a while and converting larger numbers of floor plans, you will notice that things might start to get a bit cluttered. Folders are a good way to prevent this and help order your Archilogic plans.
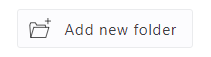
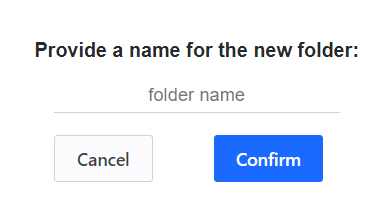
To create a new folder, click on the Add new folder button in the lower left corner of the Dashboard. All that’s left to do is to give your folder a name, click Confirm and you’re ready to get things organized.
Adding plans to a folder
To add a plan to one of the folders you’ve just created, open the 3D floor plan on your Dashboard by clicking the thumbnail image. This will lead you to the view mode of the selected plan. You’ll find the folder selection menu on the left. Here, you can select the folder that you’ve just created and this will add the plan to it.
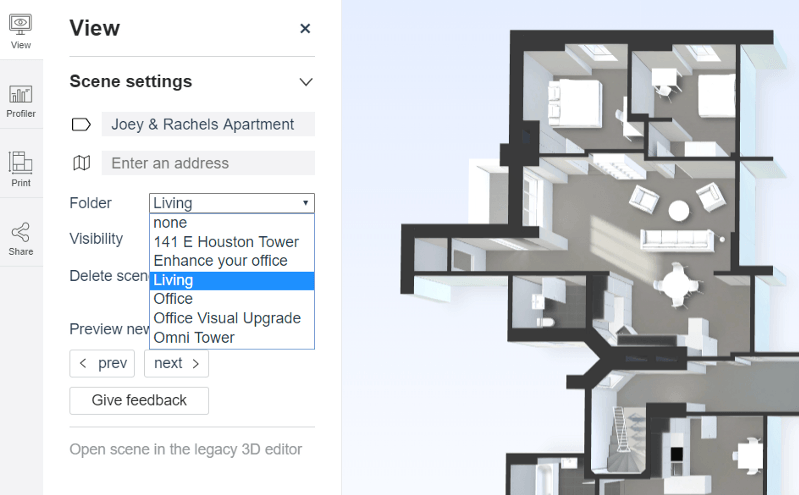
To remove a floor plan from a folder open the dropdown menu again and either select “none” or a different folder.
Edit or delete a folder
To rename or delete an existing folder, navigate to the folder list in your Dashboard. Then, click on the icon with the three dots next to the folder you want to rename or delete.
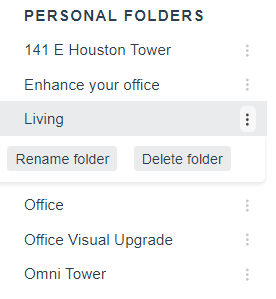
If you want to delete a folder, first make sure that it is empty. You can empty a folder by either moving the floor plans it contains into another folder or by deleting said plans.
That’s all you need to know to easily tidy up your Archilogic Dashboard.
Time for another quick read?


